The Best Fluffy Pancakes recipe you will fall in love with. Full of tips and tricks to help you make the best pancakes.
Here’s the lie—and I mean the big lie that every mountain biker believes, myself included for way too long: master the basics first, then gradually (and I mean gradually) progress to harder terrain. Slow and steady wins the race, right? Build your skills incrementally. Don’t bite off more than you can chew.
Sound familiar? It’s complete garbage advice that’s keeping you trapped in this weird cycle of mediocre riding and unnecessary crashes that could’ve been avoided.
The truth? Most mountain bike accidents don’t happen because riders attempt terrain beyond their skill level. They happen because riders approach advanced terrain with beginner mindsets—reactive instead of proactive, defensive instead of offensive, hoping they’ll make it through instead of actually knowing they will. And that hope thing? That’s where it all falls apart.
This is the fatal bottleneck destroying your progression and honestly putting you at risk: You’re trying to be “safe” by holding back, when real safety (the kind that actually matters) comes from committing forward.
The Flawed Assumption Keeping You Vulnerable
Every beginner mountain biker learns the same fundamentals: look ahead, bend your knees, stay loose, use both brakes. Good advice, I’m not saying it’s not. But here’s what nobody tells you—and I wish someone had told me this five years ago—these reactive techniques are designed to help you survive trail features, not master them.
The entire traditional approach to mountain biking safety is built on this defensive framework that sounds good but doesn’t actually work:
- Stay in control at all times
- Ride within your comfort zone (whatever that means)
- Brake before obstacles
- Take the safe line
- Build confidence slowly… very slowly
This mindset is why you’re still sketchy on features you’ve ridden a hundred times. Maybe even two hundred.
The assumption? That safety comes from caution. That you need thousands of hours—literally thousands—to develop “natural” bike handling. That rushing your progression leads to crashes (which seems logical but isn’t really true).
Here’s what actually happens though: Defensive riding creates hesitation. Hesitation creates tension in your body. Tension destroys your body position, like completely destroys it. Poor body position causes crashes. The very thing you think is keeping you safe is making you vulnerable—it’s this weird paradox that nobody talks about.
You’ve been taught to react to the trail. But reaction time is too slow, way too slow. By the time you see that rock garden and think about your line choice, adjust your weight, modulate your brakes… you’re already committed to whatever position you’re in. Hope is not a safety strategy (though we all try to make it one).
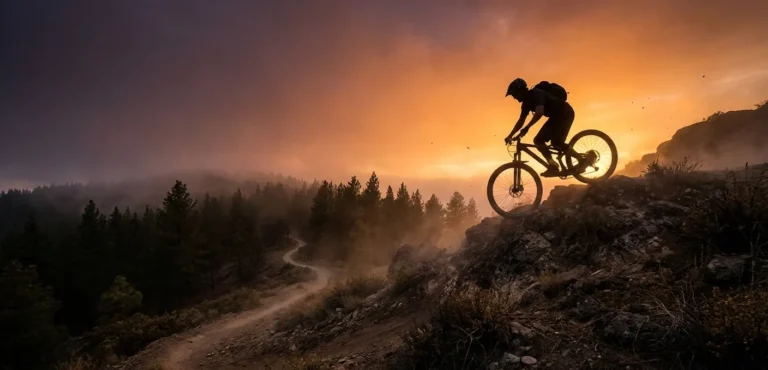
The Quantum Leap: Aggressive Pre-Riding
Here’s the paradigm shift that makes everything else irrelevant: Stop riding trails and start pre-riding them with complete commitment.
Not a casual roll-through where you kinda check things out. Not a visual inspection where you just eyeball it. A full-speed, full-commitment mental and physical rehearsal where you ride every feature exactly as you intend to when it counts—before your actual ride begins. Before the adrenaline kicks in.
This isn’t about gradually building confidence over weeks or months. This is about installing expert-level trail intelligence into your nervous system before momentum and consequences enter the equation.
The quantum leap works like this: Walk every technical section—yes, actually walk it. Identify your exact line, not just a general idea but the exact line. Physically rehearse your body movements (people will think you’re weird, who cares). Visualize the execution at speed. Then session each feature until your body knows it automatically, like muscle memory but deeper. Only then do you link features together into a full run.
This approach seems like it takes more time. It doesn’t—it actually doesn’t. It eliminates the hundreds of sketchy attempts where you’re “figuring it out” while simultaneously managing speed, terrain, and fear. Those attempts? That’s where crashes happen. That’s where I broke my collarbone in 2023, trying to figure out a rock drop while moving.
Why This Changes Everything
Traditional progression says: attempt, survive (hopefully), repeat until comfortable, increase difficulty slightly. This takes years and accumulates dozens of close calls and crashes along the way. I’ve had at least twenty close calls I can remember, probably more I’ve blocked out.
Aggressive pre-riding says: eliminate uncertainty before adding speed. When you know exactly where your wheels are going, exactly how your body needs to move, and exactly what the bike will do—speed becomes almost irrelevant. You’re not reacting anymore, you’re executing. Big difference.
Here’s the safety transformation (and this is where it gets interesting):
Instead of: “I hope I can make it through this rock garden” You get: “My front wheel goes left of that pointy rock, weight shifts back at the shelf, unweight over the last two rocks, accelerate out”
Instead of: “I might crash” You get: “I’ve done this twenty times already”
The quantum leap eliminates the gap between your skills and your execution. Most riders can physically handle way more than they think—way more—they crash because their mental processing can’t keep up with the speed at which decisions need to be made. It’s like trying to read a book while someone’s flipping the pages too fast.
Pre-riding removes the decision-making from the equation. Your body already knows what to do, it’s just waiting for you to let it.
How to Execute Your Quantum Leap
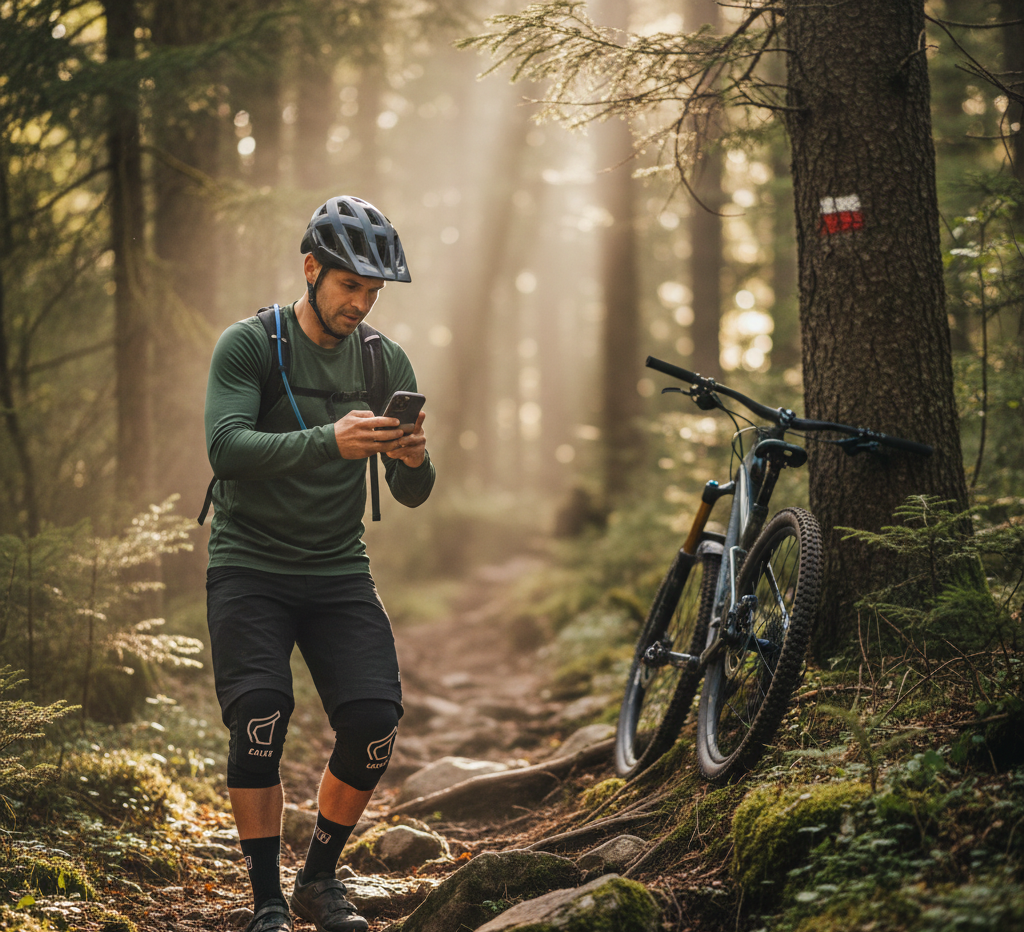
STEP 1: Complete Trail Intelligence Gathering
Before your wheels hit the trail (seriously, before):
Pre-Ride Walk-Through Protocol:
- Walk every technical section completely—don’t skip sections because they “look easy”
- Photograph or video key features from multiple angles (your phone works fine)
- Identify the A-line (ideal), B-line (safer), and bail-out options for when things go sideways
- Mark or memorize brake points, acceleration zones, and commitment points
- Note visibility issues—blind corners, sun glare, hidden obstacles that’ll surprise you
The rule: If you wouldn’t bet money on exactly what happens next, you don’t know the trail well enough yet. Simple as that.
STEP 2: Static Rehearsal
Body Position Programming:
- Physically move through each feature on foot (yeah, you’ll look silly)
- Rehearse weight shifts, hip movements, and arm positions
- Practice looking where you need to look, not at obstacles (this is harder than it sounds)
- Feel where balance and momentum transfer happen—it’s subtle
- Identify the “point of no return” for each feature, because there’s always one
Why this works: Your nervous system doesn’t distinguish between vivid mental rehearsal and actual execution. Neuroscience backs this up—you’re building the neural pathways before the adrenaline and speed complicate things. Before your lizard brain takes over.
STEP 3: Sessioning Individual Features
Isolated Feature Mastery:
- Ride each technical feature separately, 10-20 repetitions minimum (yes, minimum)
- Start at comfortable speed, increase only when execution is automatic—not before
- Focus on one technical element per session: body position OR line choice OR speed management, not all three
- Film yourself—your perception and reality are different, trust me on this
- Stop when you can hit it perfectly three times consecutively
Critical insight: Professionals don’t session features to learn them. They session features so they can forget about them and focus on flow. That’s the key difference between pros and everyone else.
STEP 4: Linking Sections
Only after individual features are automatic (not before, I’m serious):
- Link 2-3 features into sequences
- Practice transitions between features—transitions are where it gets tricky
- Build rhythm and flow, let it feel natural
- Identify rest/recovery points between technical sections
- Establish your sustainable pace, not your hero pace
STEP 5: Full Run Execution
By now, your “first” full run is actually your 50th time through these features. There are no surprises, no hope. There is only execution—clean, confident execution.
The Essential Mountain Biking Safety Framework
While aggressive pre-riding is your quantum leap (the thing that changes everything), comprehensive safety requires these non-negotiable foundations. Don’t skip these because you think you know better.
CRITICAL GEAR (Zero Compromise)
Helmet: Full-face for parks/enduro, quality half-shell minimum for XC—cheap helmets are false economy Eye Protection: Impacts happen—branches, rocks, insects (got a bee in my eye once, not fun) Gloves: Palm protection, grip, confidence boost Knee/Elbow Pads: For technical terrain, no exceptions, I don’t care how hot it is Proper Shoes: Flat pedals with pins or quality clipless system—running shoes don’t cut it Hydration Pack: 2-3 liters with emergency supplies, not just water Multi-tool & Spare Tube: Basic mechanical self-sufficiency keeps you from walking 10 miles First Aid Kit: Wounds happen far from help Communication Device: Phone in waterproof case, consider satellite communicator for remote areas (Garmin inReach is popular in 2024-2025)
PRE-RIDE SYSTEMS CHECK (5 Minutes That Prevent Disasters)
The ABC Quick Check: A – Air: Tire pressure correct for terrain and weight—this matters more than you think B – Brakes: Pads have material, levers feel firm, rotors clean C – Chain/Cranks/Cassette: Lubed, tight, shifting clean
The Rock and Roll:
- Lift front wheel 6 inches, drop—listen for loose components
- Lift rear wheel 6 inches, drop—same check
- Rock bike side to side—headset tight?
- Bounce on saddle—seatpost secure? (learned this one the hard way)
The Ride-Around:
- 50-meter test ride with braking, shifting, standing, seated
- Any weird sounds, feelings, or responses = stop and inspect immediately
ON-TRAIL RISK MANAGEMENT
The Commitment Triangle (Memorize This, Seriously):
Vision → Line Choice → Body Position
- Vision: Look 3-5 features ahead, not at your front wheel—where you look is where you go
- Line Choice: Committed before you’re close enough to doubt it
- Body Position: Heavy feet, light hands, hips mobile, chest open (not hunched over)
Speed Management Hierarchy:
- Before the feature (ideal—most control, best body position)
- Early in the feature (acceptable—still have options)
- Middle of the feature (dangerous—committed with poor position, this is panic territory)
- After the feature (too late—you’re hoping, not controlling)
The 3-Second Rule:
- Keep 3+ seconds between you and other riders
- Allows reaction time for their crashes or sudden stops
- Prevents pile-ups in technical sections—I’ve seen gnarly pile-ups that could’ve been avoided
Energy Management:
- Technical riding is cognitively exhausting, more than physically exhausting sometimes
- Fatigue kills decision-making faster than anything
- Rest before you think you need to (not after you’re already wrecked)
- Eat/drink every 30-45 minutes, not when depleted—sports nutrition science is clear on this
TERRAIN-SPECIFIC PROTOCOLS
Descents:
- Weight back but not locked out—stay dynamic
- Cover brakes, feather don’t grab (grabbing = washing out)
- Look through corners to exits, not at the scary parts
- Speed is stability—too slow is actually sketchy (counterintuitive but true)
Climbs:
- Weight forward for traction on steep stuff
- Seated for steep technical, standing for power moves
- Momentum management over pure strength—it’s chess not arm wrestling
- Look for the smoothest line, not the straightest
Technical Features:
- Commit or don’t attempt—half-commitment causes crashes every single time
- Unweight over obstacles, push down after
- Manual/wheelie over gaps and obstacles when appropriate
- When in doubt, go faster (within reason—speed creates stability but there’s a limit obviously)
Corners:
- Outside foot down and weighted—this is fundamental physics
- Inside arm pushing bar down and forward
- Look at exit before entry (your body follows your eyes)
- Brake before turning, coast through turn, accelerate at exit—not all at once
EMERGENCY RESPONSE ESSENTIALS
Crash Protocol:
- Assess yourself first—can you move everything? Any sharp pain? Disorientation, seeing stars?
- Get off the trail—prevent secondary impacts from other riders
- Assess bike—safe to ride or mechanical issue that’ll make things worse?
- Treat injuries—stop bleeding first, immobilize second, clean wounds third
- Decide: ride out or call for help—ego doesn’t belong in this decision (leave your pride at home)
The Injury Evaluation Matrix:
Ride Out: Scrapes, bruises, minor cuts, sore but mobile—the usual stuff Get Help: Suspected fractures, head impact with confusion, severe bleeding that won’t stop, inability to bear weight, chest/abdominal trauma (don’t mess around with this)
Trail Location Awareness:
- Know where you are at all times—GPS coordinates if possible
- Use trail apps with offline maps (Trailforks, MTB Project are solid in 2025)
- Share your route and expected return time with someone
- Understand evacuation options from different trail sections—some areas are hours from rescue
The Challenge: Take Your Quantum Leap This Week
Here’s your mandate: Choose one trail you ride regularly but still feel sketchy on. This week—not next month, this week—pre-ride it using this complete protocol.
Not part of it. All of it.
Walk the technical sections like you’ve never seen them before. Photograph your lines from different angles. Rehearse your body movements until your legs are tired from walking. Session each feature until it’s automatic, until you could do it blindfolded (don’t actually do it blindfolded). Then link them together and feel the difference.
Your “comfortable” riding has a ceiling, probably a pretty low one. The quantum leap shatters it completely.
Will it feel excessive? Absolutely—you’ll think you’re overthinking it. Will other riders think you’re weird for walking sections and taking videos? Probably, maybe even definitely. Will you be the one who rides with confidence while they’re white-knuckling through sections hoping to survive?
Guaranteed.
The riders who progress fastest aren’t the ones with the best natural talent or the highest risk tolerance (though those help). They’re the ones who eliminate uncertainty before adding speed. They’re the ones who do the boring prep work that nobody sees.
Stop hoping you’ll make it through. Start knowing you will—there’s a massive difference in how that feels in your body, in your mind.
Your quantum leap awaits. The trail hasn’t changed one bit. But after this week, you will have… completely.
Now go pre-ride like your progression depends on it. Because it does.
Read our Full Mountain Biking Guide for more info and tips !
Safety note: This approach assumes you’re attempting terrain within your physical capability range—don’t be stupid about this. Aggressive pre-riding prepares you to execute at your current skill level with confidence, it doesn’t replace proper progression or make you invincible (you’re still very much breakable). Always wear appropriate protective gear, ride within your limits, respect trail conditions and your body’s feedback. If something feels wrong, it probably is.