The Best Fluffy Pancakes recipe you will fall in love with. Full of tips and tricks to help you make the best pancakes.
Look, I’ll be honest with you. The first time I watched a riding buddy get stretchered off a trail — collarbone snapped clean, helmet cracked, that particular shade of pale that tells you something serious just happened — I didn’t think about protocols. I thought: that’s going to be a long few months for him. And it was. Partly because of the injury. Mostly because of how he handled the recovery.
That’s the thing nobody warns you about. The crash is five seconds. The aftermath? That’s where you either lose the whole season or claw it back.
Injury mountain biking costs riders more time than the injuries themselves probably should. And the frustrating part — the genuinely maddening part — is that most of that extra downtime is self-inflicted. You came into the season with a plan, maybe you’d been working on [How to Get Faster at Mountain Biking (Proven Training Blueprint)], stacking fitness, dialing your skills — and then one wrong line on a wet root and suddenly you’re on the ground wondering how bad it is.
The 72-Hour Window (Don’t Blow This One)
Here’s what happens right after you get hurt: your body launches a full inflammatory response. Swelling, heat, pain — the whole theatrical production. And most riders, because this is what we’ve all been told forever, immediately reach for ibuprofen, a bag of frozen peas, and the couch.

Wrong. Outdated. Actually counterproductive.
The PEACE & LOVE protocol — yes that’s a real thing, published in the British Journal of Sports Medicine back in 2019 — replaced the old RICE method and it’s honestly kind of embarrassing that most people still haven’t heard of it. The inflammatory process your body initiates isn’t the enemy. It’s the first chapter of the repair story. Suppress it too aggressively and you’re basically editing out the opening act and wondering why the plot doesn’t make sense later.
What you actually do in those first 72 hours:
- Protect the injury — but only for 1–3 days, not an entire week of couch-rotting
- Elevate above heart level, at least 20 minutes, three times daily (set an alarm, you’ll forget)
- Avoid NSAIDs for the first 48 hours — Advil can wait
- Compress it with an elastic bandage, nothing dramatic
- Load it early — pain-free movement starting around day 3 or 4
A rider with a Grade I AC joint sprain who starts gentle pendulum shoulder work on day 3 is back on trail in roughly 18 days. The guy who fully immobilizes it — who treats his shoulder like a museum exhibit — averages 35+ days. Same injury. Completely different outcome based almost entirely on what happens in the first week.
The 72 hours matter more than the next six weeks combined. Don’t waste them.
Keep Moving — Just Not That Part
This sounds counterintuitive, I know. But stay with me here.
When your upper body is wrecked — collarbone, shoulder, wrist, whatever — your legs still work. Your cardiovascular system still works. Blood flow accelerates healing systemwide, not just at the injury site. Think of it less like “exercising while hurt” and more like… keeping the delivery trucks running so supplies can reach the construction zone faster.
Get on a trainer. Hit Zone 2 heart rate — somewhere between 60 and 70% of your max — for 30 to 45 minutes a day. Start around day 5 to 7, once the acute inflammation has done its job. If your lower body is the problem, swim. Do upper body circuits. Something. Anything that keeps the engine ticking — because if you’ve ever read about [How to Increase Your MTB Endurance Fast], you already know how brutally long it takes to build that aerobic base. Letting it rot on the couch for six weeks because of a wrist sprain is genuinely painful to think about.
Riders with broken collarbones who maintain trainer sessions through recovery lose less than 8% of their VO₂max over six weeks. Those who go fully sedentary? They’re looking at 22 to 28% loss. That’s not just fitness — that’s months of rebuilding just to get back to where you started. Which is somehow worse than the original injury, mentally speaking.
Blood flow restriction training is worth mentioning too — 10 minutes on the injury site, if your physio clears it. It sounds like something from a fringe sports science podcast (and honestly it did start that way) but the evidence behind it now is pretty solid.
Feed the Repair Crew
Nobody talks about nutrition during injury recovery. Everyone talks about rest, and sleep, and “listening to your body” — which, fine, sure — but tissue repair is a construction project and construction projects need materials.
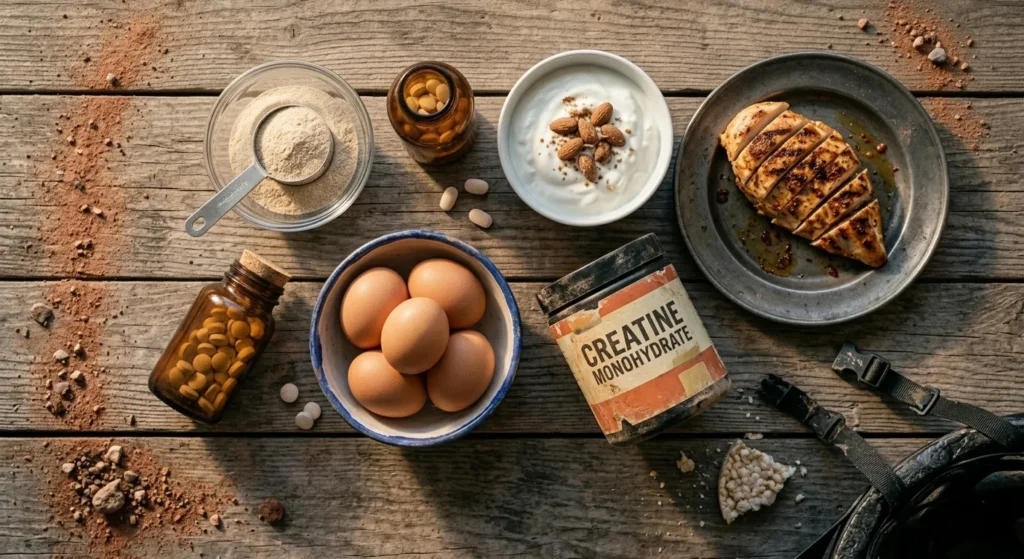
Protein first. Bump it to 1.8 to 2.2 grams per kilogram of bodyweight every day. That’s probably more than you’re eating right now.
Then — and this one genuinely surprised me when I first read the research — 15 grams of collagen peptides taken with 50mg of Vitamin C, consumed about 60 minutes before any rehab exercise. The timing matters. The University of Auckland published data showing athletes using this combination had twice the collagen synthesis in tendon and ligament tissue compared to those who didn’t. Twice. For something that costs about four dollars a day.
Leucine-rich foods too — eggs, chicken thighs, Greek yogurt — aim for 3 grams of leucine per meal. And if you’re going to be partially immobilized for any stretch of time, 5 grams of creatine monohydrate daily will slow the muscle loss considerably. It’s not glamorous supplementation. It’s just the stuff that actually works. Incidentally, this is the kind of marginal-gain thinking that separates serious riders from casual ones — and if you want to go deeper on that mindset, [What Pro Mountain Bikers Do Differently (That You Don’t)] is worth a read when you’re recovered and back to planning your next block.
Load It or Lose It
Somewhere along the way, “rest the injury” became “don’t move ever.” That’s not what rest means in a clinical context. Passive immobilization past the acute phase produces disorganized scar tissue — healing that looks okay on the surface but re-tears at the first real load because it never learned how to handle stress.
Start progressive loading by week 2. Not week six. Week two.
- Weeks 1–2: Isometrics — 5 sets of 45-second holds, low intensity, nothing heroic
- Weeks 2–3: Move through the pain-free range — 3 sets of 15 reps, slow and controlled
- Weeks 3–4: Add actual resistance, working toward 70% of your one-rep max
- Week 4 onwards: Sport-specific loading — gradually simulating what trail riding actually demands of that joint
A Grade II MCL sprain managed this way sees riders back on technical singletrack in 6 to 7 weeks. The conventional rest-first approach? 10 to 12 weeks for the exact same injury. The body is not a fragile object that needs protecting from movement. It’s a system that needs progressively harder inputs to reorganize itself correctly.
Most Crashes Aren’t Random (This One Stings a Little)
I hate this part to admit, but — most mountain biking injuries follow predictable patterns. They happen in the last 20% of a ride when you’re cooked but pushing anyway. They happen on features that are one skill tier past your current ability. They happen because someone skipped the knee pads because the trail “wasn’t that gnarly.”
Prevention is boring to talk about and it’s the single highest-return investment you can make.
The fatigue cutoff: Make a personal rule — no high-consequence feature attempts in the final 20% of any ride. Decision-making degrades, reaction time slows, and that gap you’ve hit clean forty times suddenly catches you wrong. Most trail injuries don’t happen at the start of the day. And if fatigue is a recurring problem for you — if you’re consistently running out of gas in the back half of rides — that’s a fitness and pacing issue worth addressing directly. [How to Climb Steep Trails Without Burning Out] covers the energy management side of this in a way that directly reduces your late-ride crash risk. Worth bookmarking even if you’re not a climber.
Gear: CE Level 1 knee pads minimum. MIPS helmet. Full-finger gloves. This is not an aesthetic conversation — it’s a tissue-integrity conversation.
Pre-season strength work: Eight weeks — just 8 weeks of targeted shoulder, wrist, and hip stability training before the season starts can reduce injury rates by up to 65%. Sixty-five percent. For eight weeks of unglamorous gym work that most riders skip because it’s “not riding.”
“I tore my AC joint in March — Grade II, doctors said minimum eight weeks. I started the PEACE & LOVE protocol the same day, kept doing lower body and trainer work, loaded collagen every morning before physio. I was back on trail in 22 days. Twenty-two. My physio was more surprised than I was honestly.” — Marco R., enduro competitor
Okay, Here’s the Part Where I Tell You to Actually Do Something
Injury mountain biking doesn’t have to mean a lost season. It doesn’t have to mean four months of watching trail edits on your phone while your fitness evaporates and your skills go soft. It means — if you’re smart about it — a brief, intentional pause. And when you do come back, you come back with better habits, better gear, and a recovery protocol that actually works.
Start here:
- Injured right now? Apply PEACE & LOVE today, not tomorrow
- Begin collagen loading within the first 72 hours
- Get Zone 2 cardio back in by day 5, whatever body part still works
- Progressive loading starts week 2 — no exceptions, no waiting
- Healthy currently? Audit your gear, start pre-season stability work, set your fatigue cutoff rule before your next ride
When you’re back on the bike and ready to rebuild — properly this time — start with [How to Get Faster at Mountain Biking]. That’s your return-to-performance roadmap. Everything else builds from there.
The riders who recover fastest aren’t tougher or luckier. They just stopped treating recovery like a passive experience and started treating it like training. Because that’s exactly what it is.
Get back on the bike.